CircleCI Tutorial For Beginners

In this CIrcleCI tutorial for beginners, you’ll see how to set up linting and testing in 2 languages.
We’ll also set up e2e tests.
Here’s the repo we’ll use.
Jobs To Add
- Lint and test JavaScript
- Lint and test PHP
- End to end test
Lint And Test JavaScript
Start by adding an empty.circleci/config.yml file to your repo.
We’ll add an orb for Node to the top of the config:
Orbs are like helper functions for CircleCI.
Next, we’ll name the job js-build, and run some scripts like lint:js and test:js:
Notice on line 14 how it uses node/install-packages.
That’s from the orb we defined above.
It does npm ci and caches Node dependencies.
There’s also an image value:
That’s a pre-built CircleCI image that will spin up quickly, and has a minimum of layers.
Lint And Test PHP
Now, we’ll add jobs to lint and test PHP.
Notice that this also has a docker image value, but for a PHP image:
All of the jobs we’ll add start with a checkout step.
That makes the code available in the container.
Next, we’ll run the PHPUnit tests on 4 versions of PHP.
This could mean a lot of duplicate YAML.
But you’ll see how to do this with very little extra code.
We’ll start by adding a php-test job:
This accepts a parameter of php-version-number.
For example, when the PHP version is 8.1, the docker image will be cimg/php:8.1
Now, let’s add the parameters.
We’ll skip to the bottom of the file and add a workflows value:
Notice on line 70 how there are parameters of the PHP versions.
End To End Test
Now, we’ll add one more job, an e2e test:
That has an ubuntu image, as that image can run Docker from inside the image.
The final step is store_artifacts.
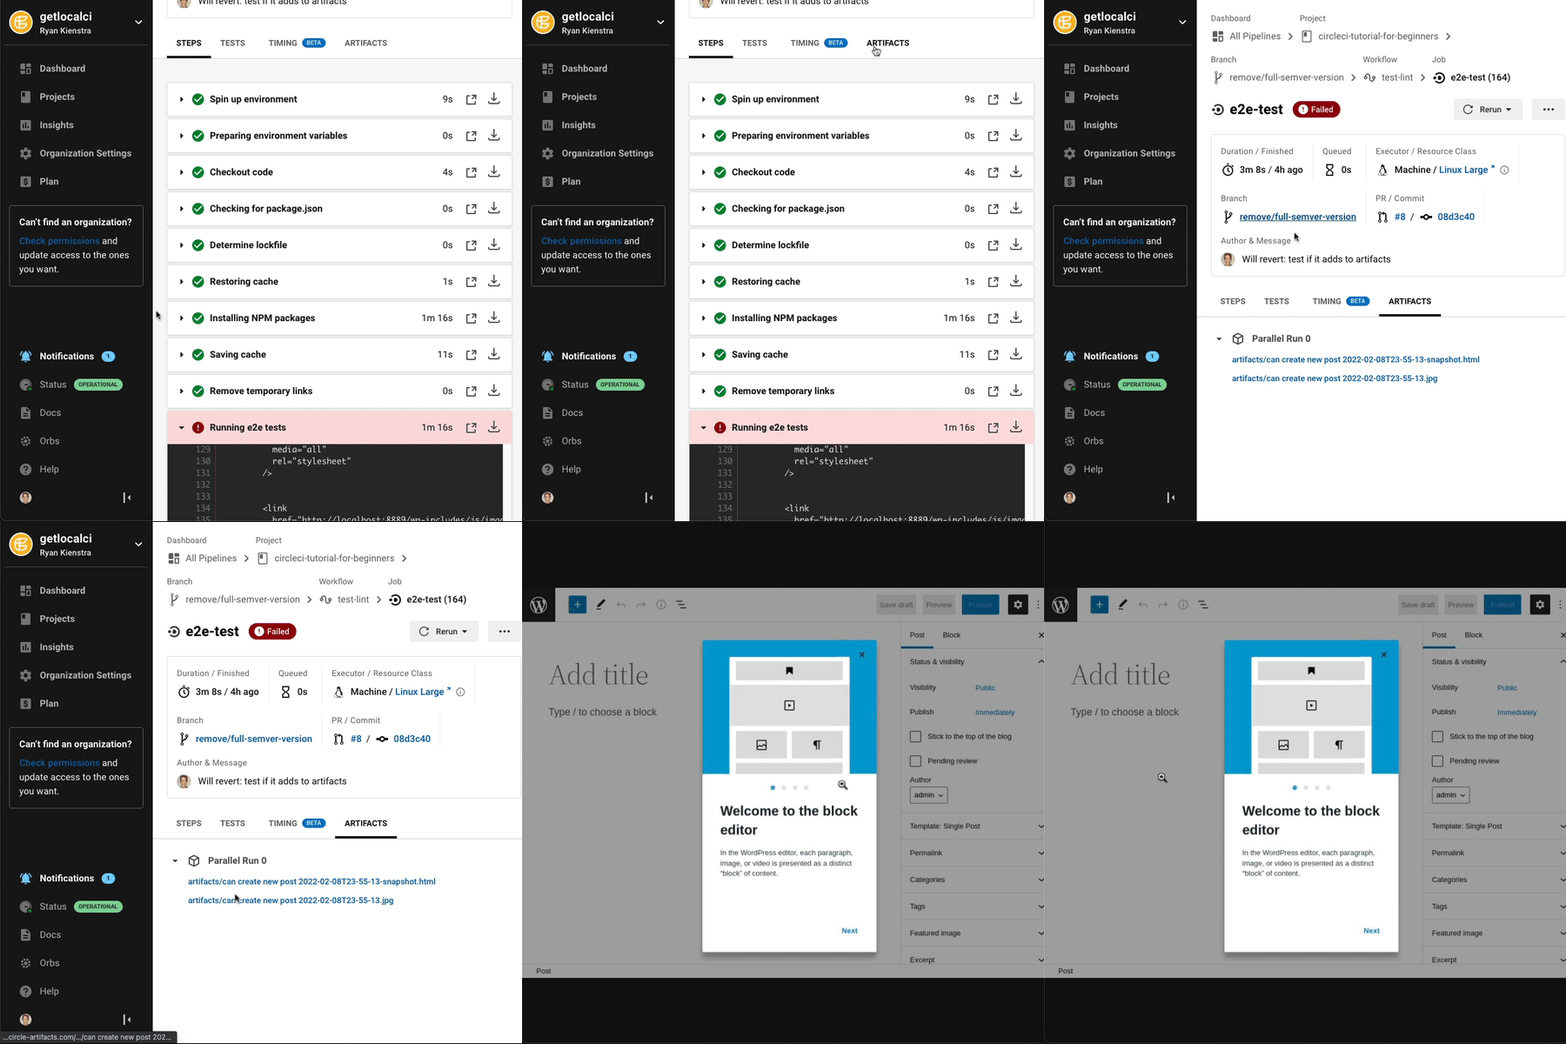
If the Puppeteer test fails, it’ll add debugging .html and .jpg files to artifacts/
Those show the final state when the tests failed.
That store_artifacts step will make the artifacts available in the CircleCI UI:

Then, we’ll add the e2e-test job on line 71, and the file is complete:
You can now push this completed file to your repo.
CircleCI UI
Next, we’ll set up the CircleCI UI and you’ll be done.
If you don’t have a CircleCI account, you can sign up for the free plan.
The free plan is more than enough for this tutorial, and even several more projects.
Then, go to app.circleci.com.
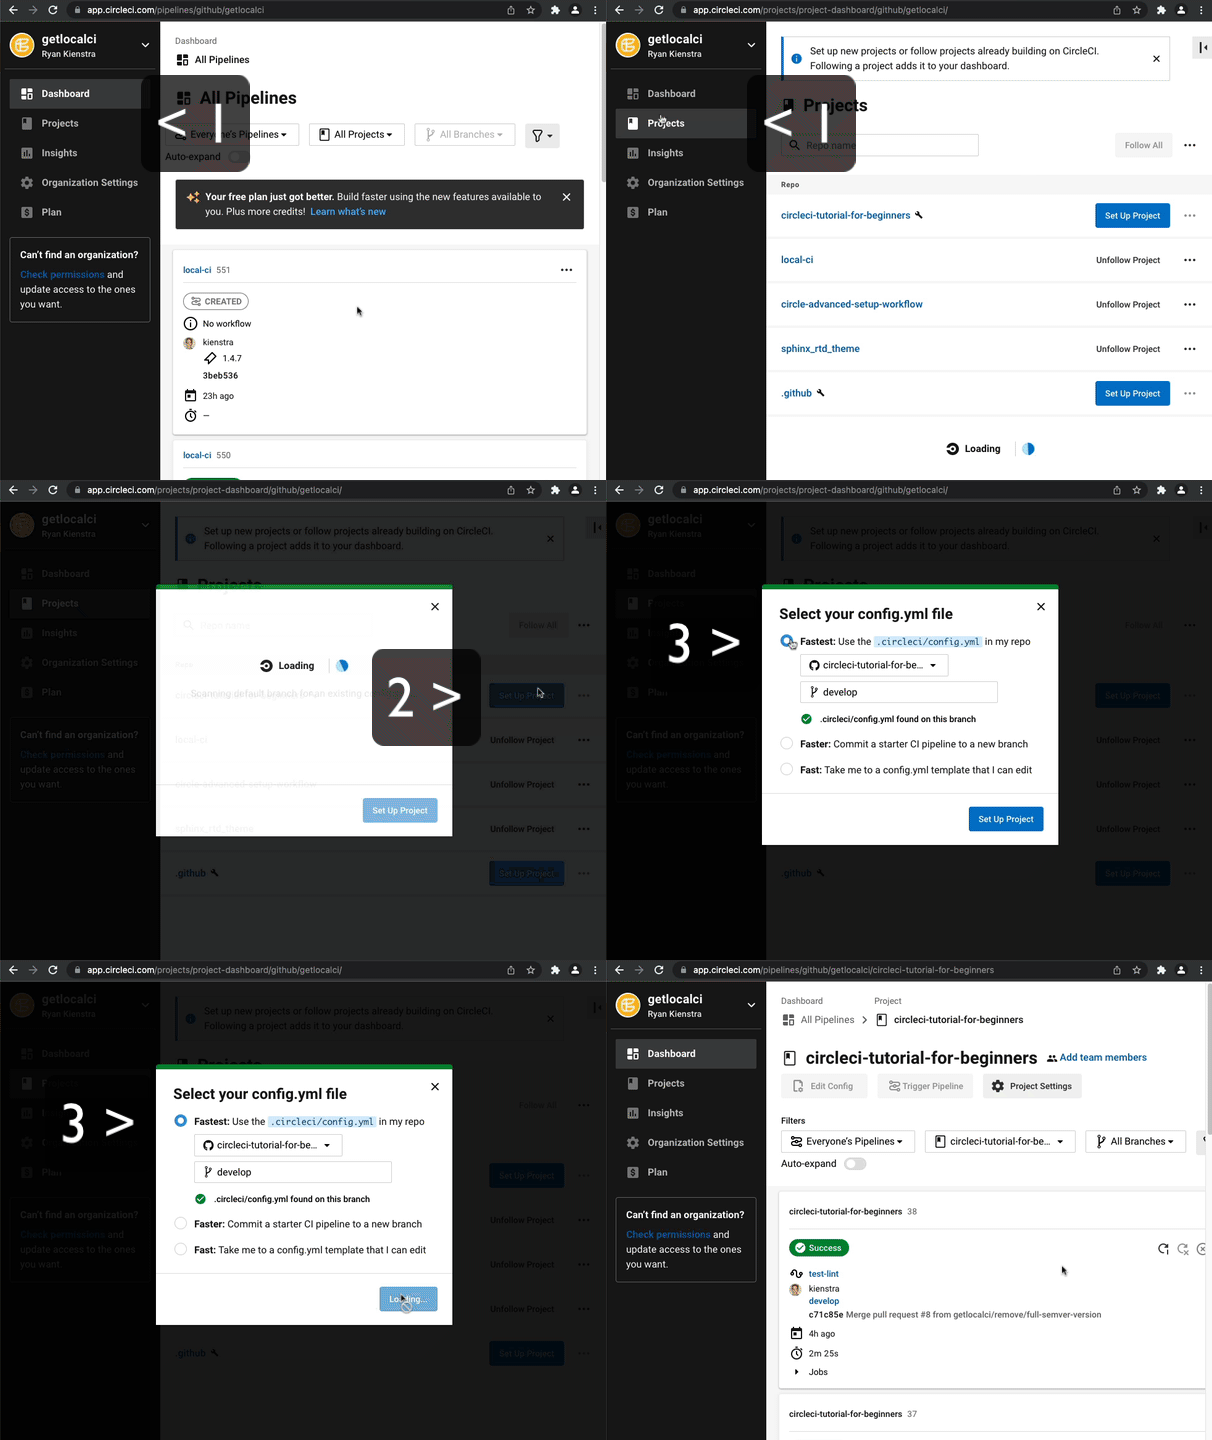
Click ‘Projects’, select the repo, click ‘Fastest: Use the .circleci/config.yml in my repo’, and click ‘Set Up Project’:

CircleCI should now run for your repo.
CircleCI Tutorial For Beginners
In this tutorial, you saw a typical setup for JavaScript, PHP, and e2e tests.
Now that you’re up and running, here’s a way to speed up your builds.